Support Suite
User Login
|
Adding additional Mobile Carriers for the "Send Text Message" feature
Posted by Kevin Merta on 28 August 2012 10:28 AM
|
|
|
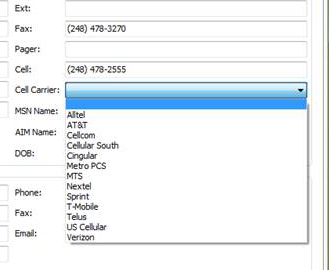
Adding Additional Mobile Carriers For The ‘Send Text Message’ Feature This article applies to customer hosted accounts only. If you have an EIOBoard-hosted account and do not see your mobile carrier listed, please let us know by e-mailings support@eioboard.com. This way, we can have it added to the list in a future release. EIOBoard has the ability to send text messages to a user’s mobile phone directly from the interface. This is configured for each user in the Administration area.
If you do not see a particular mobile carrier listed, then you would need to add it to the EIOBoard database. Run the following SQL insert on the database in order to add the desired mobile carrier. Here is an example for Rogers Wireless. Change the mobile carrier name to how you would like it to appear in the list. Change the mobile carrier e-mail domain to the appropriate value. This is usually referred to as the “SMS gateway”. Please contact your mobile phone provider to obtain this information, or to see if they support this feature. INSERT INTO MobileCarriers (MobileCarrierName, MobileCarrierEMailDomain) Version 8.0 And Beyond ONLY If you are running EIOBoard 8.0 or a later version, you will now need to run a SQL update on the database. After running this, restart your EIOBoard client. The list of mobile carriers will now contain the new providers that you just added. UPDATE OrganizationSettings Version 7.1 And Before ONLY If you are running EIOBoard 7.1 or an earlier version, the next step is to go to Settings and uncheck Enable Cache on the client application. Caching speeds up the login process and makes general use of EIOBoard faster. When enabled, EIOBoard will not re-read the MobileCarriers table. Once disabled, you would need to fully exit EIOBoard and restart. Now the new mobile carrier that you added will be loaded, and you can re-enable caching. The setting is stored in the registry on each individual PC, so you can use Group Policy to toggle the setting for everyone. The key is stored here, depending if you are using the standalone or Outlook add-in version. The value can be 0 for not enabled and 1 for enabled. | |
|
|
|

